今日はNeptune 6.5を使ってみたいと思います
NeptuneはGermany(ドイツ)発のDebian安定版ベースのディストリビューションです KDE Plasmaをクールにカスタマイズしたデスクトップは、オフィシャルでもパーソナルでも使えるスタンダードで即戦力なLinux
太陽系第8惑星の名は伊達ではないですよ
Neptune 6.5
![](https://i0.wp.com/lovely910.com/wp-content/uploads/2020/07/001joiahuhaiuhiu.jpg?resize=1024%2C576&ssl=1)
Release | 2020.07.08 |
Type | Linux |
Based on | Debian (Stable) |
Package Management | DEB |
Architecture | x86_64 |
Desktop | KDE Plasma |
ダウンロード
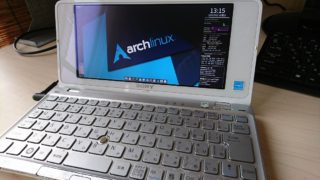
ECS LIVE STATION LS-4-64
![](https://i0.wp.com/lovely910.com/wp-content/uploads/2020/01/DSC_1405.jpg?resize=960%2C540&ssl=1)
CPU | Intel Celeron N2830 (SoC) Processor |
RAM | DDR3L 4GB |
VIDEO | Intel® HD graphics |
STORAGE | SATADOM 64GB |
LAN機能1x GIGABIT LAN ポート WiFi IEEE 802.11b/g/n + Bluetooth4.0 ワイヤレス給電 (Qi)Qi V1.1.2 (5V1A=5W max) |
Live BootできるUSBメモリの作成
パソコンからUSBメモリを使ってLinuxを起動できるUSBメモリを作成します Windows・Mac・Linuxを使っての作成方法は下記記事を参考にしてください
![](https://i0.wp.com/lovely910.com/wp-content/uploads/2021/03/2021032402.png?resize=160%2C90&ssl=1)
![](https://i0.wp.com/lovely910.com/wp-content/uploads/2020/05/fcxdfxfdcgvgcfgdxsss.jpg?resize=160%2C90&ssl=1)
USBメモリを使って起動
USBメモリを使っての起動は、Bios画面のBootメニューで一番に起動するデバイスを、USBメモリを選択します そして再起動します
この画面が現れます Other Languagesで言語を設定できますが、起動オプションの書き換えをしなきゃなので、面倒なので英語で起動します
![](https://i0.wp.com/lovely910.com/wp-content/uploads/2020/07/000hiuahiuhafiuhi.jpg?resize=1024%2C577&ssl=1)
起動しました LS-4−64での起動後の挙動はそこそこ軽快 ★★☆☆ 使えなくないレベルですが、快適さを求めるなら設定を見直した方がいいですね
![](https://i0.wp.com/lovely910.com/wp-content/uploads/2020/07/002huafgiagifia.jpg?resize=1024%2C576&ssl=1)
Live Bootでの日本語化
System Settingsを起動します
Regional Settingsを開きLanguageを日本語に設定します
![](https://i0.wp.com/lovely910.com/wp-content/uploads/2020/07/010oigjsjoij.png?resize=1025%2C219&ssl=1)
Formatsを日本語に設定します
![](https://i0.wp.com/lovely910.com/wp-content/uploads/2020/07/012jiuhriufhi.png?resize=1025%2C219&ssl=1)
Date&TimeをAsia/Japanに設定します
![](https://i0.wp.com/lovely910.com/wp-content/uploads/2020/07/012ufa998ya8y.png?resize=1023%2C277&ssl=1)
一旦ログアウトし、再ログインで日本語化されます ログイン時のPasswordは「live」です
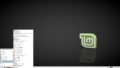
Desktop
Neptune 6.5のデスクトップはパネルが下に設置 マウスは左シングルクリック実行の設定です
![](https://i0.wp.com/lovely910.com/wp-content/uploads/2020/07/001joiahuhaiuhiu.jpg?resize=1024%2C576&ssl=1)
パネルアイテム
![](https://i0.wp.com/lovely910.com/wp-content/uploads/2020/07/002hiuahifagiuyfgiu.png?resize=465%2C244&ssl=1)
アプリケーションメニュー
アプリケーションメニューは設定でウィジェットを変更できます
![](https://i0.wp.com/lovely910.com/wp-content/uploads/2020/07/020jioafjoiajoi.png?resize=481%2C474&ssl=1)
パネル上で右クリックでウィジェットを変更メニューを表示
好みのウィジェットでカスタマイズできます
![](https://i0.wp.com/lovely910.com/wp-content/uploads/2020/07/021fiuahgaiuh.png?resize=342%2C516&ssl=1)
シンプルなランチャーは機能的で使い易いですね
![](https://i0.wp.com/lovely910.com/wp-content/uploads/2020/07/022faoihuahi.png?resize=299%2C636&ssl=1)
全画面を使ったランチャーです
![](https://i0.wp.com/lovely910.com/wp-content/uploads/2020/07/023uafuahifhaiufhu.jpg?resize=1024%2C576&ssl=1)
![](https://i0.wp.com/lovely910.com/wp-content/uploads/2020/07/003oiafhaiguyga.png?resize=506%2C437&ssl=1)
日時
パネル上は時計を表示 クリックでカレンダーを表示します
![](https://i0.wp.com/lovely910.com/wp-content/uploads/2020/07/024kfaiojajio.png?resize=353%2C394&ssl=1)
デスクトップ上での右クリックメニュー
デスクトップの右クリックメニューはKDE Plasmaの割に少なめです
![](https://i0.wp.com/lovely910.com/wp-content/uploads/2020/07/025jaijfuahiu.png?resize=253%2C214&ssl=1)
デスクトップの設定
デスクトップ背景画像はオリジナルの画像が数枚用意されています
![](https://i0.wp.com/lovely910.com/wp-content/uploads/2020/07/026oiajfiaguyguya.png?resize=649%2C518&ssl=1)
System Tools
System Settings
各種設定ツールのSystem Settingsです
![](https://i0.wp.com/lovely910.com/wp-content/uploads/2020/07/030jiufiuahiiau.png?resize=1024%2C734&ssl=1)
Konsole
ターミナルエミュレーターのKonsoleです
![](https://i0.wp.com/lovely910.com/wp-content/uploads/2020/07/031jiajfiuhafgyua.png?resize=698%2C547&ssl=1)
Dolphin
高機能ファイルマネージャーのDolphinです
![](https://i0.wp.com/lovely910.com/wp-content/uploads/2020/07/032hiaufhyuagyuag.png?resize=742%2C584&ssl=1)
Discover
アプリ管理ツールのDiscoverです
GUI操作にてアプリをインストールできるツールです
![](https://i0.wp.com/lovely910.com/wp-content/uploads/2020/07/033joaifiuuahiu.png?resize=892%2C682&ssl=1)
Applications
Firefox
ウェブブラウザのFirefoxです
![](https://i0.wp.com/lovely910.com/wp-content/uploads/2020/07/040jofoahiuahiuhi.png?resize=988%2C828&ssl=1)
LibreOffice
オフィスアプリのLibreOfficeです
![](https://i0.wp.com/lovely910.com/wp-content/uploads/2020/07/041jaofjoiafiof.png?resize=851%2C625&ssl=1)
Amarok
ミュージックプレイヤーのAmarokです
![](https://i0.wp.com/lovely910.com/wp-content/uploads/2020/07/042jaifiuahfui.png?resize=920%2C669&ssl=1)
日本語入力
Neptune 6.5にはim-configがあるので、そちらでも設定できます
今回は無難にFcitxをインストール設定します
Konsoleを起動します
下記コマンドを入力してFcitx関連をインストールします
$ sudo apt-get update
$ sudo apt-get install fcitx fcitx-mozc
一旦ログアウトして、再ログインで日本語入力できます
再ログインするとパネルにFcitxが表示されているので、クリックして設定画面を開きます
Input Methodタブで日本語キーボードとMozcが設定されている事を確認します
![](https://i0.wp.com/lovely910.com/wp-content/uploads/2020/07/050jfiajiajoif.png?resize=678%2C539&ssl=1)
ワープロアプリを起動して日本語入力テストします
![](https://i0.wp.com/lovely910.com/wp-content/uploads/2020/07/051fjaiuhiuhi.png?resize=725%2C559&ssl=1)
インストール
インストーラーは左側にあるインストーラーのアイコンをクリックで起動します
言語を選択して使うことができるので、比較的簡単に扱えます
![](https://i0.wp.com/lovely910.com/wp-content/uploads/2020/07/060jiaufhahui.png?resize=1024%2C560&ssl=1)
Neptune 6.5って軽量?
今回もCore2Duo搭載したLet’s note CF-R6(Windows Vista世代)でも起動してみました
CPU | Intel(R) Core 2 Duo U7500 |
RAM | DDR2 SDRAM 1.5GB |
STORAGE | SATA 500GB |
起動後の挙動は使えなくないレベル 本格的に使いたいのなら設定を見直した方がいいですね 多分この辺のスペックが使える最低限のスペックな気がします KDE Plasmaは軽量ではありますが、描画効果を結構使っているので、GPUは無くてもそこそこの描画能力のあるCPUを積んだパソコンを使う事をお勧めします
![](https://i0.wp.com/lovely910.com/wp-content/uploads/2020/07/061kfaoijioajo.png?resize=1024%2C768&ssl=1)
今回使ったCF-R6はWindows Vista世代でしたが、Vista世代を使うのならワンランク上のCPUを搭載したパソコンを使った方がいいですね
あとがき
Neptune 6.5は、良くも悪くも無難なディストリビューションです 普段使いのOSってNeptune 6.5の様な無難なOSを選ぶといいんですよね 特に面白みは有りませんが安定して使えるOSってそれだけで価値観高めです
コメント