今日はリリース間もないXubuntu 20.04 LTS Focal Fossaを使ってみます
XubuntuはUbuntuコミュニティから派生したディストリビューションです 軽量でいてカスタマイズ性の高いXfceデスクトップでビルドされた外観は無駄がなく軽快に動作します パーソナル、そしてオフィシャルでも使えるので世界中にはファンの多いディストリビューションです
そんなXubuntuが長期サポート版の20.04LTSをリリース
これは使わない手は無いですよね
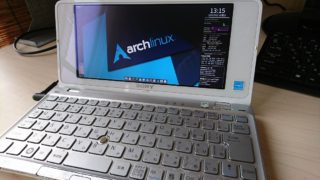
今回は13年前のWindows Vista世代のCoer2Duo搭載のSONY VAIO TypeCにインストールしてみたいと思います
Xubuntu 20.04 LTS Focal Fossa
![](https://i0.wp.com/lovely910.com/wp-content/uploads/2020/04/2020-04-25_08-35-52.png?resize=1024%2C640&ssl=1)
Release | 2020.4.23 |
Type | Linux |
Based on | Debian, Ubuntu (LTS) |
Package Management | dpkg |
Architecture | x86_64 |
Desktop | Xfce |
システム要件
最小システム | 推奨システム | |
CPU | IntelまたはAMD64ビットプロセッサ | 1.5Ghz以上のデュアルコアプロセッサ |
メモリ | 512MB | 2GB |
ディスク容量 | 8GB | 20GB |
32bitのXubuntu18.04を実行するには、 32bitプロセッサがPAEをサポートしている必要があります |
この数値は公式よりアナウンスされているものです
![](https://i0.wp.com/lovely910.com/wp-content/uploads/2020/05/010hjdbaaaaaccccakdddddv.jpg?resize=160%2C90&ssl=1)
Download
SONY VAIO TypeC VGN-C90HS
![](https://i0.wp.com/lovely910.com/wp-content/uploads/2019/11/DSC_1105.jpg?resize=1024%2C576&ssl=1)
CPU | Core 2 Duo プロセッサー T7200 |
RAM | DDR2 SDRAM、DDR2 667対応 2GB |
Graphics | NVIDIA GeForce Go 7400 GPU |
STORAGE | HDD 80GB |
IEEE802.11a/b/g | |
※キーボードが壊れて無いので、USB外付けを使用 |
Live BootできるUSBメモリの作成
パソコンからUSBメモリを使ってLinuxを起動できるUSBメモリを作成します Windows・Mac・Linuxを使っての作成方法は下記記事を参考にしてください
![](https://i0.wp.com/lovely910.com/wp-content/uploads/2021/03/2021032402.png?resize=160%2C90&ssl=1)
USBメモリを使って起動
USBメモリを使っての起動は、Bios画面のBootメニューで一番に起動するデバイスを、USBメモリを選択します そして再起動します
Xubuntuは電源ONでそのまま起動します そしてこの画面が現れます 左より使用する言語を選択し[Xubuntuを試す]をクリックします
![](https://i0.wp.com/lovely910.com/wp-content/uploads/2020/04/000huwhfuyhsuhuyhyutrfhuisrf.jpg?resize=966%2C735&ssl=1)
インストール
起動しました 左側にあるインストーラーのアイコンをクリック インストーラーを起動します
![](https://i1.wp.com/lovely910.com/wp-content/uploads/2020/04/2020-04-24_23-02-04.jpg?fit=1024%2C640&ssl=1)
言語を選択します
![](https://i0.wp.com/lovely910.com/wp-content/uploads/2020/04/001hiquefhuhfuihfuhuhi.jpg?resize=936%2C541&ssl=1)
キーボードレイアウトを選択します 日本で販売されている日本語のWindowsが入っているパソコンは大体下記でOKです
![](https://i0.wp.com/lovely910.com/wp-content/uploads/2020/04/002huihfeiuhhfuahjoifjoi.jpg?resize=934%2C546&ssl=1)
インストールでネットに繋ぐのでノートパソコンの場合Wi-Fiへの接続を促します このネットワークに接続するを選択し接続するSSIDを選択します
![](https://i0.wp.com/lovely910.com/wp-content/uploads/2020/04/003huhfiuhiuhfaihyguyahiu.jpg?resize=935%2C544&ssl=1)
ネットワーク認証を求められます SSIDのPasswordを入力します
![](https://i0.wp.com/lovely910.com/wp-content/uploads/2020/04/004iufrhfhojaaopkpo.jpg?resize=489%2C297&ssl=1)
問題なく接続できたら接続を確立した事を通知します
![](https://i0.wp.com/lovely910.com/wp-content/uploads/2020/04/005hhfrhifoijachuihaoijoji.jpg?resize=341%2C97&ssl=1)
インストール時にアップデートやサードパーティのソフトウェアをインストールするか選択します この辺は後で入れるのは煩わしいので一緒に入れてしまいましょう
![](https://i0.wp.com/lovely910.com/wp-content/uploads/2020/04/005hiuhfilalihciuhaijojoi.jpg?resize=939%2C539&ssl=1)
上記の画面で続けるをクリックすると下記ウィンドウが開きます [はい]をクリックします
![](https://i1.wp.com/lovely910.com/wp-content/uploads/2020/04/006huhfiaujcoijaojcajopcapok.jpg?fit=1024%2C136&ssl=1)
インストールの種類を指定します HDD全て削除してインストールする場合は上の「ディスクを削除して…」を選択 それ以外のパーティションを指定する場合は下の「それ以外」を選択します
今回インストールするパソコンには他のLinuxが入っているので、それを残して他のパーティションへインストールするので、「それ以外」を選択します
![](https://i0.wp.com/lovely910.com/wp-content/uploads/2020/04/007uygaygiuhaicojoicjoai.jpg?resize=932%2C538&ssl=1)
インストールするパーティションを下記の様に編集します
![](https://i0.wp.com/lovely910.com/wp-content/uploads/2020/04/008hiuahiuaijcioajuhiuahioc.jpg?resize=932%2C775&ssl=1)
上記で[OK]をクリックすると下記ウィンドウが開き、選択したディスクに変更を加える際の最終確認します[続ける]をクリックでディスクに変更が加えられます 変更終了後に下にある[インストール]をクリックでインストールが始まります
![](https://i0.wp.com/lovely910.com/wp-content/uploads/2020/04/009huywfeeiuhahiuhehaioj.jpg?resize=678%2C221&ssl=1)
ロケーションを地図で指定します
![](https://i0.wp.com/lovely910.com/wp-content/uploads/2020/04/010hiuhfiuafahciajoijcojo.jpg?resize=935%2C777&ssl=1)
ユーザー情報を入力します
![](https://i0.wp.com/lovely910.com/wp-content/uploads/2020/04/011ifhiuhfijiojoijichiua.jpg?resize=933%2C774&ssl=1)
インストールは10分前後で終了します 掛かる時間はパソコンのスペックで若干前後します
![](https://i0.wp.com/lovely910.com/wp-content/uploads/2020/04/012hiufhiufhryuagcihaijoia.jpg?resize=749%2C500&ssl=1)
インストール完了しました パソコンをシャットダウンして、USBメモリを確実に抜きましょう
![](https://i0.wp.com/lovely910.com/wp-content/uploads/2020/04/013hiufhiuhfuihicjoijioahiuh.jpg?resize=468%2C162&ssl=1)
日本語化詳細
先ずはパソコンを起動させます
起動したら設定マネージャーを起動させます そして言語サポートを起動 起動時に下記の様に、インストールを促されますのでインストールします
![](https://i0.wp.com/lovely910.com/wp-content/uploads/2020/04/016huihfiuahauhhuhiu.jpg?resize=728%2C527&ssl=1)
インストールは数分で終了します 終了後に[システム全体に適用]をクリック
![](https://i0.wp.com/lovely910.com/wp-content/uploads/2020/04/017hiuehfiuhfgyguhijajoi.jpg?resize=394%2C476&ssl=1)
地域フォーマットタブをクリック こちらも[システム全体に適応]をクリックします
![](https://i0.wp.com/lovely910.com/wp-content/uploads/2020/04/018jiurjfuihuwhfrjwojpo.jpg?resize=392%2C473&ssl=1)
Desktop
起動後の挙動は軽快 6.5★★★☆☆ 完全に現役マシンとして使うことができます
Xbuntuはパネルが上部に設置 マウスは左ダブルクリックで実行の設定です
![](https://i1.wp.com/lovely910.com/wp-content/uploads/2020/04/2020-04-25_08-31-50.jpg?fit=1024%2C640&ssl=1)
パネル左側
![](https://i0.wp.com/lovely910.com/wp-content/uploads/2020/04/014hefiuhiuhaiaijfhaeiufhiau.jpg?resize=112%2C141&ssl=1)
① Applications Menu
![](https://i0.wp.com/lovely910.com/wp-content/uploads/2020/04/019hiuhfiuhwfurhwyhfywgfy.jpg?resize=454%2C530&ssl=1)
パネル右側
![](https://i0.wp.com/lovely910.com/wp-content/uploads/2020/04/015hiuwhriuhiuffffsfuiji.jpg?resize=345%2C136&ssl=1)
② 通知
![](https://i0.wp.com/lovely910.com/wp-content/uploads/2020/04/020jiujfiuhuihuygyugiuhio.jpg?resize=243%2C153&ssl=1)
③ Bluetooth
Bluetoothの設定パネルです
![](https://i0.wp.com/lovely910.com/wp-content/uploads/2020/04/021huihiufijqoifjiqhuihi.jpg?resize=437%2C317&ssl=1)
④ ネットワーク
ネットワークの設定及び、Wi-Fiの接続可能なSSIDを表示・設定・接続パネル
![](https://i0.wp.com/lovely910.com/wp-content/uploads/2020/04/022hiuhfufhuihiojoajkoi.jpg?resize=441%2C347&ssl=1)
⑤ Fcitx
インプットメソッドフレームワークのFcitxです
![](https://i0.wp.com/lovely910.com/wp-content/uploads/2020/04/023hiufhiufhaifjoijaojoai.jpg?resize=367%2C320&ssl=1)
⑥ ディスプレイの輝度調整
電源管理です クリックでディスプレイの輝度調整が現れます
![](https://i0.wp.com/lovely910.com/wp-content/uploads/2020/04/024hiufhiuhhuiajioiko.jpg?resize=256%2C142&ssl=1)
⑦ ボリュームコントロール
サウンドデバイスの音量調整です デフォルトのミュージックプレイヤーのParoleとも、連動コントロールできます
![](https://i0.wp.com/lovely910.com/wp-content/uploads/2020/04/025iufhiuhijoajcuhauihio.jpg?resize=325%2C191&ssl=1)
⑧ 日時
パネル上は日時の表示 クリックでカレンダーが表示されます
![](https://i0.wp.com/lovely910.com/wp-content/uploads/2020/04/026hiuhfiufhygyugcuihiuhuyhi.jpg?resize=240%2C197&ssl=1)
デスクトップ上の右クリックメニュー
![](https://i0.wp.com/lovely910.com/wp-content/uploads/2020/04/027uyfuhiuhaguygaugciuahu.jpg?resize=218%2C330&ssl=1)
デスクトップの設定
デスクトップ上の右クリックメニューより起動 デスクトップの背景画像はオリジナルの画像が数枚用意されています
![](https://i0.wp.com/lovely910.com/wp-content/uploads/2020/04/028jijirjoijvoiiuhiajoajopkp.jpg?resize=694%2C625&ssl=1)
システムツール
設定マネージャー
各種設定ツールの設定マネージャーです
![](https://i0.wp.com/lovely910.com/wp-content/uploads/2020/04/029hiufhiuahfuhahfui.jpg?resize=728%2C529&ssl=1)
ソフトウェア
アプリ管理ツールのソフトウェアです GUI操作にてアプリのインストールが行えるツールです
![](https://i0.wp.com/lovely910.com/wp-content/uploads/2020/04/030jiufhahuihiajiojouyagfygauyuy.jpg?resize=912%2C689&ssl=1)
Thunar
ファイルマネージャーのThunarです カスタマイズ性の高いXfceならではの、多機能なファイルマネージャーです
![](https://i0.wp.com/lovely910.com/wp-content/uploads/2020/04/031hefhuiahfjaiajacliuhiajoijkoia.jpg?fit=1024%2C475&ssl=1)
Xfce4-Terminal
ターミナルエミュレータのXfce4-Terminalです
![](https://i0.wp.com/lovely910.com/wp-content/uploads/2020/04/033hiuhfruijifojoijiuhui.jpg?resize=631%2C516&ssl=1)
タスクマネージャー
CPU・メモリ等の使用量をモニタリングできるツールです
このパソコンでこの数値の安定感!! 素晴らしい Bravo!! Xubuntu20.04!!
![](https://i0.wp.com/lovely910.com/wp-content/uploads/2020/04/035hiufhuhuycyuaijoijai.jpg?resize=496%2C492&ssl=1)
Applications
Internet
インターネットアプリは必要最低限用意されています SNS系のクライアントアプリは後でインストールしましょう
![](https://i0.wp.com/lovely910.com/wp-content/uploads/2020/04/036guyauhefufguyagyuuiha.jpg?resize=264%2C114&ssl=1)
ウェブブラウザは定番のFirefoxです
![](https://i0.wp.com/lovely910.com/wp-content/uploads/2020/04/037guahcijoaugfkyugyugayuguy.jpg?resize=926%2C634&ssl=1)
Office
オフィスアプリはLibreOfficeが入っています
![](https://i0.wp.com/lovely910.com/wp-content/uploads/2020/04/038yuagygaughaiuhgauykgyu.jpg?resize=263%2C214&ssl=1)
LibreOfficeの表計算アプリです
![](https://i0.wp.com/lovely910.com/wp-content/uploads/2020/04/039hiufhuiahfuyauihiaiu.jpg?resize=816%2C572&ssl=1)
Graphics
![](https://i0.wp.com/lovely910.com/wp-content/uploads/2020/04/040uyfhuiahijcoiajijhiuah.jpg?resize=269%2C116&ssl=1)
画像編集アプリのGIMPです 某社のPSと変わらないパフォーマンスを持っています
![](https://i0.wp.com/lovely910.com/wp-content/uploads/2020/04/041huihefuihiuahlliuhaiuhiu.jpg?resize=879%2C604&ssl=1)
Multimedia
マルチメディアアプリは編集系が無いので、必要に応じてインストールしましょう
![](https://i0.wp.com/lovely910.com/wp-content/uploads/2020/04/042jiufhiuhfuhijoiajciojauihiu.jpg?resize=267%2C88&ssl=1)
ミュージックプレイヤーはParoleです
![](https://i0.wp.com/lovely910.com/wp-content/uploads/2020/04/043jfiuiuhruihijaokcpoakpo.jpg?resize=752%2C522&ssl=1)
日本語入力
日本語入力アプリはFcitxとMozcはインストール済で、直ぐに使うことができます
![](https://i0.wp.com/lovely910.com/wp-content/uploads/2020/04/044hiuhagcyuahiuahaoijiuhui.jpg?resize=586%2C506&ssl=1)
LibreOfficeのワープロアプリ使ってみました 問題なく日本語入力は使えます
![](https://i0.wp.com/lovely910.com/wp-content/uploads/2020/04/045hiurhiuhrvyaojkopakioj.jpg?resize=905%2C743&ssl=1)
Youtube
あとがき
Xubuntu 20.04 LTS Focal Fossaは見事VAIO TypeCを再生させました
この挙動は13年前のパソコン!?って思わせるような軽快な挙動 完全に現役で使えるレベルです いや現役で使わなければ勿体無い ホントに素晴らしい 素晴らしいの一言です
Linuxには軽量なディストリビューションは多く存在します 必ずしも軽量=快適 では無いです しかしXubuntuは軽量と快適な使い勝手を持ち合わせています こればかりはインストールして使ってみなければ判りません
自分がグダグダと話してもアレなので、少しでも興味が湧いたら取り敢えずLive Bootで使ってみる事をオススメします
Xubuntu 20.04 LTS Focal Fossaは色々な意味で、今年紹介した中でNo1のディストリビューションです
![](https://i0.wp.com/lovely910.com/wp-content/uploads/2020/04/034hiuhfiurhhygygrfyuhuci.jpg?resize=778%2C520&ssl=1)
今回Xubuntuに消費した容量は5.4GB程です これはOSとしてはまずまずですね
アプリのインストールを考えると最低でも15GBは欲しいところですね
![](https://i2.wp.com/lovely910.com/wp-content/uploads/2020/04/DSC_0089.jpg?fit=1024%2C576&ssl=1)
コメント