今日はPCLinuxOS 2020.05を使ってみたいと思います
PCLinuxOSはUSA(アメリカ合衆国)発のディストリビューションです UIがとてもシンプルで使いやすく、WindowsやMacユーザーでも直ぐに使えるようなディストリビューションです
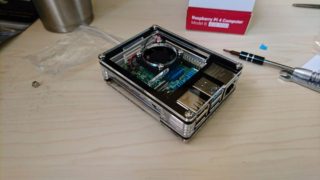
そんなPCLinuxOS 2020.05のXfceデスクトップを、Windows Vista世代 Coer2Duo搭載のSONY VAIO TypeC にインストールしてみたいと思います
PCLinuxOS 2020.05
![](https://i0.wp.com/lovely910.com/wp-content/uploads/2020/05/Screenshot_2020-05-06_22-55-50.png?resize=1024%2C640&ssl=1)
Release | 2020.5.04 |
Type | Linux |
Based on | Independent |
Package Management | RPM (APT) |
Architecture | x86_64 |
Desktop | KDE Plasma, MATE, Xfce |
Download
SONY VAIO TypeC VGN-C90HS
![](https://i0.wp.com/lovely910.com/wp-content/uploads/2019/11/DSC_1105.jpg?resize=1024%2C576&ssl=1)
CPU | Core 2 Duo プロセッサー T7200 |
RAM | DDR2 SDRAM、DDR2 667対応 2GB |
Graphics | NVIDIA GeForce Go 7400 GPU |
STORAGE | HDD 80GB |
IEEE802.11a/b/g | |
※キーボードが壊れて無いので、USB外付けを使用 |
Live BootできるUSBメモリの作成
パソコンからUSBメモリを使ってLinuxを起動できるUSBメモリを作成します Windows・Mac・Linuxを使っての作成方法は下記記事を参考にしてください
![](https://i0.wp.com/lovely910.com/wp-content/uploads/2021/03/2021032402.png?resize=160%2C90&ssl=1)
USBメモリを使って起動
USBメモリを使っての起動は、Bios画面のBootメニューで一番に起動するデバイスを、USBメモリを選択します そして再起動します
この画面が現れます Enterキーを押します
![](https://i0.wp.com/lovely910.com/wp-content/uploads/2020/05/000nbjhbfcjhachabkhgvf.jpg?resize=966%2C535&ssl=1)
インストール
起動しました 左側にあるインストーラーのアイコンをクリック起動させます
![](https://i0.wp.com/lovely910.com/wp-content/uploads/2020/05/Screenshot_2020-05-06_21-55-26.png?fit=1024%2C640&ssl=1)
インストーラーが起動しました Next をクリック
![](https://i0.wp.com/lovely910.com/wp-content/uploads/2020/05/001njisgnlisnbgyushbguyhsui.jpg?resize=615%2C459&ssl=1)
コンピュータのデバイスにどうインストールするか選択します
このパソコンはパーティションを切ってあるので、一番下の「Custom disk partitioning」を選択します
![](https://i0.wp.com/lovely910.com/wp-content/uploads/2020/05/002hhebfaubcjhabkhcbahbcha.jpg?resize=622%2C468&ssl=1)
どのパーテイションにインストールするか選択します
左上の色分けされているグラフの様なパーティションよりインストールするパーティションをクリックします
そして右側の「Mount Point」をクリックし「/」を選択します
「Format」はクリックでフォーマットされます
Done をクリックします
![](https://i0.wp.com/lovely910.com/wp-content/uploads/2020/05/003hiuabrhlblvhblvhjn.jpg?resize=622%2C466&ssl=1)
選択したパーティションの確認です Next をクリック
![](https://i0.wp.com/lovely910.com/wp-content/uploads/2020/05/004hirbfhabvvbnvfahbhj.jpg?resize=624%2C470&ssl=1)
Next をクリックでインストール開始します
![](https://i0.wp.com/lovely910.com/wp-content/uploads/2020/05/005bjahrfvbhankjnaklmvkla.jpg?resize=621%2C470&ssl=1)
インストール開始しました 数分で終了します
![](https://i0.wp.com/lovely910.com/wp-content/uploads/2020/05/006bhabnjnkjanvjkajknkl.jpg?resize=622%2C465&ssl=1)
ブートローダーの確認です
特に変更が無ければ Next をクリックします
![](https://i0.wp.com/lovely910.com/wp-content/uploads/2020/05/007huhahbchjbajnakjnkjckl.jpg?resize=624%2C464&ssl=1)
このパソコンに入っている他のOSの確認です
特に変更無ければ Next をクリックします
![](https://i0.wp.com/lovely910.com/wp-content/uploads/2020/05/008huabcuabubaiuncjankjc.jpg?resize=627%2C462&ssl=1)
インストール終了です Finish をクリックしてパソコンをシャットダウンさせます
そしてUSBメモリを確実に抜いて終了です
![](https://i0.wp.com/lovely910.com/wp-content/uploads/2020/05/009hiauhnfliablhabhbljn.jpg?resize=629%2C473&ssl=1)
パソコンを起動させるとこの画面が現れます
タイムゾーンを選択します
![](https://i0.wp.com/lovely910.com/wp-content/uploads/2020/05/010jajcnchbchdiauij.jpg?resize=817%2C487&ssl=1)
Next をクリックします
![](https://i0.wp.com/lovely910.com/wp-content/uploads/2020/05/011hiulhabcdbbn.jpg?resize=832%2C501&ssl=1)
root(管理者権限)のパスワードを設定します
![](https://i0.wp.com/lovely910.com/wp-content/uploads/2020/05/012jauhniubnbhjabvhbija.jpg?resize=868%2C534&ssl=1)
ユーザー情報とユーザーパスワードを設定します
とりあえず入力はここまでです
![](https://i0.wp.com/lovely910.com/wp-content/uploads/2020/05/013haifhiaubnhnb.jpg?resize=943%2C549&ssl=1)
起動
起動しました
![](https://i0.wp.com/lovely910.com/wp-content/uploads/2020/05/Screenshot_2020-05-06_22-41-31.png?fit=1024%2C640&ssl=1)
Wi-Fiを設定
パネルにあるネットワークセンターを起動します
接続可能なWi-FiのSSIDが表示されているので、接続するSSIDを選択すると下記のように設定画面が開きます 認証Keyを入力して設定 接続します
![](https://i0.wp.com/lovely910.com/wp-content/uploads/2020/05/014nhjfabjhabjnjnmakjdjk.jpg?resize=807%2C579&ssl=1)
接続できたら下記の様なウィンドウが表示されます
![](https://i0.wp.com/lovely910.com/wp-content/uploads/2020/05/015jiafninndbnhabuybuihj.jpg?resize=549%2C122&ssl=1)
日本語化
日本語化に必要な locales-ja をインストールします
![](https://i0.wp.com/lovely910.com/wp-content/uploads/2020/05/016hauifuilahlfufbhnajnhja.jpg?resize=859%2C673&ssl=1)
Control Centerを起動します
System → Localization → Manage localization for your systemを開きます
![](https://i0.wp.com/lovely910.com/wp-content/uploads/2020/05/017bfahbhbjhbakjbianiuh.jpg?resize=822%2C637&ssl=1)
言語を設定します
Japaneseを選択します
![](https://i0.wp.com/lovely910.com/wp-content/uploads/2020/05/018aukyfuafuyakbhnack.jpg?resize=968%2C637&ssl=1)
国を設定します
Japanを選択します
![](https://i0.wp.com/lovely910.com/wp-content/uploads/2020/05/019hiauhfyagbuygauhiaj.jpg?resize=960%2C637&ssl=1)
再起動で日本語化されます
![](https://i0.wp.com/lovely910.com/wp-content/uploads/2020/05/020haubfkbkubcjanuiniun.jpg?resize=961%2C195&ssl=1)
再起動しました 日本語のフォントが残念過ぎるのでお気に入りのフォントを入れます
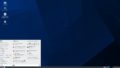
![](https://i1.wp.com/lovely910.com/wp-content/uploads/2020/05/Screenshot_2020-05-06_22-50-28.png?fit=1024%2C640&ssl=1)
![](https://i0.wp.com/lovely910.com/wp-content/uploads/2020/01/0000fakjfnkajkmlak.jpg?resize=160%2C90&ssl=1)
Desktop
PCLinuxOS 2020.05はパネルは上に設置 下部にはパネルランチャーが設置 マウスは左シングルクリック実行の設定です
![](https://i0.wp.com/lovely910.com/wp-content/uploads/2020/05/Screenshot_2020-05-06_22-55-50.png?fit=1024%2C640&ssl=1)
パネル左側
![](https://i0.wp.com/lovely910.com/wp-content/uploads/2020/05/021jiujfauihfuihauihfuahyu.jpg?resize=260%2C189&ssl=1)
① Xfce4 WhiskerMenu
![](https://i0.wp.com/lovely910.com/wp-content/uploads/2020/05/024iauhnriabubvhabvnbiu.jpg?resize=449%2C564&ssl=1)
② Thunar
ファイルマネージャーのThunarです
![](https://i0.wp.com/lovely910.com/wp-content/uploads/2020/05/025uanfjnchbaiuoamkcmkla.jpg?fit=1024%2C470&ssl=1)
③ Settings
各種設定ツールのSettingsです
![](https://i0.wp.com/lovely910.com/wp-content/uploads/2020/05/026hifanlijnabiajokaokpo.jpg?resize=860%2C590&ssl=1)
④ PCLinuxOS Control Center
PCLinuxOSのシステム関連の設定ツールの、Control Centerです
![](https://i0.wp.com/lovely910.com/wp-content/uploads/2020/05/027haiuhiaubvubahbvanj.jpg?resize=964%2C648&ssl=1)
⑤ Synapticパッケージマネージャー
アプリ管理ツールのSynapticパッケージマネージャーです
![](https://i2.wp.com/lovely910.com/wp-content/uploads/2020/05/028huahbvuybuyabvubuhj.jpg?fit=1024%2C707&ssl=1)
パネル右側
![](https://i0.wp.com/lovely910.com/wp-content/uploads/2020/05/022hiuarhabhvuygbauyuiaiujnjk.jpg?resize=533%2C179&ssl=1)
⑥ Workspace Switcher
複数あるワークスペースを切り替えるツールです
![](https://i0.wp.com/lovely910.com/wp-content/uploads/2020/05/029huiahuyahuhvuyauyhui.jpg?resize=430%2C393&ssl=1)
⑦ IBus
インプットメソッドフレームワークのIBusです
![](https://i0.wp.com/lovely910.com/wp-content/uploads/2020/05/030jiuarfhuiahygyuhhbhc.jpg?resize=458%2C468&ssl=1)
⑧ Bluetooth
Bluetoothの設定ツールです
![](https://i0.wp.com/lovely910.com/wp-content/uploads/2020/05/031njhqfbhqbcbqjhbjniunci.jpg?resize=534%2C423&ssl=1)
⑨ アップデートの通知
![](https://i0.wp.com/lovely910.com/wp-content/uploads/2020/05/032hafbauyhbfabhhabhcj.jpg?resize=395%2C139&ssl=1)
⑩ ネットワークセンター
ネットワークの設定 接続可能なWi-FiのSSIDを表示・設定・接続ツール
![](https://i0.wp.com/lovely910.com/wp-content/uploads/2020/05/033iuafrayhbhbanbuhbiu.jpg?resize=386%2C267&ssl=1)
⑪ 音量調整
サウンドデバイスの音量調整
![](https://i0.wp.com/lovely910.com/wp-content/uploads/2020/05/034hfiurhfabhbabnuayhbui.jpg?resize=397%2C201&ssl=1)
⑫ 電源管理
電源管理 ディスプレイの輝度調整です
残念ながらこのパソコンでは、デフォルトで輝度調整は動作しませんでした
![](https://i0.wp.com/lovely910.com/wp-content/uploads/2020/05/035jirniuabivniajiojiuhaiko.jpg?resize=409%2C177&ssl=1)
⑬ 通知
![](https://i0.wp.com/lovely910.com/wp-content/uploads/2020/05/036hiauhuyabbaiioajoijcio.jpg?resize=426%2C186&ssl=1)
⑭ Clipman
クリップボードの履歴管理ツールです
![](https://i0.wp.com/lovely910.com/wp-content/uploads/2020/05/037hurbbbvyqnjfnnviunie.jpg?resize=443%2C404&ssl=1)
⑮ 日時
パネル上では日時を表示 クリックでカレンダーが表示されます
![](https://i0.wp.com/lovely910.com/wp-content/uploads/2020/05/038hiauhuiahbuiabuyvbuyaj.jpg?resize=191%2C253&ssl=1)
⑯ セッションのオプション
クリックでコンピューターのセッションのオプションの、ログアウト・シャットダウン等ができます
![](https://i0.wp.com/lovely910.com/wp-content/uploads/2020/05/039hauihvuyabyubuahbhj.jpg?resize=165%2C206&ssl=1)
パネルランチャー
![](https://i0.wp.com/lovely910.com/wp-content/uploads/2020/05/023jhiurfhuihbfgbuhijvkadkj.jpg?resize=382%2C167&ssl=1)
⑰ デスクトップを表示
クリックで全てのウィンドウが閉じ、デスクトップが表示されます
![](https://i0.wp.com/lovely910.com/wp-content/uploads/2020/05/040aiurfaubuybvauybajniau.jpg?resize=507%2C109&ssl=1)
⑱ Terminal
ターミナルエミュレーターのTerminalです
![](https://i0.wp.com/lovely910.com/wp-content/uploads/2020/05/041huefhbuyfuaybuhbcuia.jpg?resize=826%2C568&ssl=1)
⑲ Thunar
ファイルマネージャーのThunarです
⑳ Firefox
ウェブブラウザのFirefoxです
![](https://i0.wp.com/lovely910.com/wp-content/uploads/2020/05/042fhaifabfaybvjcmoikaokmok.jpg?resize=933%2C676&ssl=1)
㉑ Application Finder
![](https://i0.wp.com/lovely910.com/wp-content/uploads/2020/05/043hiurfhuahbuabhbhc.jpg?resize=485%2C501&ssl=1)
㉒ Directory Menu
![](https://i0.wp.com/lovely910.com/wp-content/uploads/2020/05/044haiufhauhbfahnnaj.jpg?resize=473%2C660&ssl=1)
デスクトップ上での右クリックメニュー
![](https://i0.wp.com/lovely910.com/wp-content/uploads/2020/05/045bahrbubhubahbhjcnij.jpg?resize=253%2C354&ssl=1)
Desktop→Background
デスクトップ上の右クリックメニューのDesktop Settingsより起動 デスクトップの壁紙はオリジナルの画像が数枚用意されています
![](https://i0.wp.com/lovely910.com/wp-content/uploads/2020/05/046nijgrnabaubiuhbaimkm.jpg?resize=771%2C670&ssl=1)
Applications
Internet
![](https://i0.wp.com/lovely910.com/wp-content/uploads/2020/05/047hbuyhabuhbfuabijanjkc.jpg?resize=330%2C415&ssl=1)
メールクライアントは定番のThunderbirdです
![](https://i0.wp.com/lovely910.com/wp-content/uploads/2020/05/048hauihfuyuyauyhcuiahnuihj.jpg?resize=846%2C674&ssl=1)
Office
![](https://i0.wp.com/lovely910.com/wp-content/uploads/2020/05/049hauyhuyagyucgbuaycubah.jpg?resize=326%2C387&ssl=1)
オフィスアプリも定番のLibreOfficeが入っています
![](https://i0.wp.com/lovely910.com/wp-content/uploads/2020/05/050hjiuahuygbvayugbauyuh.jpg?resize=859%2C662&ssl=1)
Graphics
![](https://i0.wp.com/lovely910.com/wp-content/uploads/2020/05/051hfabfuahbchabubaiucj.jpg?resize=331%2C162&ssl=1)
画像編集アプリも定番のGIMPが入っています
![](https://i0.wp.com/lovely910.com/wp-content/uploads/2020/05/052joijafnanonaiunvuikl.jpg?resize=899%2C700&ssl=1)
Sound
![](https://i0.wp.com/lovely910.com/wp-content/uploads/2020/05/053jarhiuhiubikmckmappaco.jpg?resize=328%2C148&ssl=1)
ミュージックプレイヤーはStrawberryです
![](https://i0.wp.com/lovely910.com/wp-content/uploads/2020/05/054jirajiuhaiuhvniuainja.jpg?resize=921%2C603&ssl=1)
再生時は曲の始まり部分で、楽曲の詳細が表示されます
![](https://i0.wp.com/lovely910.com/wp-content/uploads/2020/05/055hiuahfiuhagvuyagbuyijk.jpg?resize=558%2C80&ssl=1)
Strawberryはパネルの音量調整とも連動操作できます
![](https://i0.wp.com/lovely910.com/wp-content/uploads/2020/05/056ignibvhbamoijoiao.jpg?resize=462%2C269&ssl=1)
あとがき
PCLinuxOS 2020.05はCoer2Duo搭載のSONY VAIO TypeCで軽快に動作しました
先日このVAIO TypeCにはXubuntu20.04LTSをインストールしてかなり良い感じで使えましたが、それに負けず劣らずのパフォーマンスに正直驚きました 完全に普通に使えるレベルです
しかもCPUがかなり安定、メモリの消費も良い感じです
![](https://i0.wp.com/lovely910.com/wp-content/uploads/2020/05/057haiuhfuirahiuajkmkl.jpg?resize=515%2C511&ssl=1)
但し、PCLinuxOS 2020.05には完全な日本語化に若干不安があるので、その辺は大丈夫って人にはオススメなディストリビューションですね
コメント